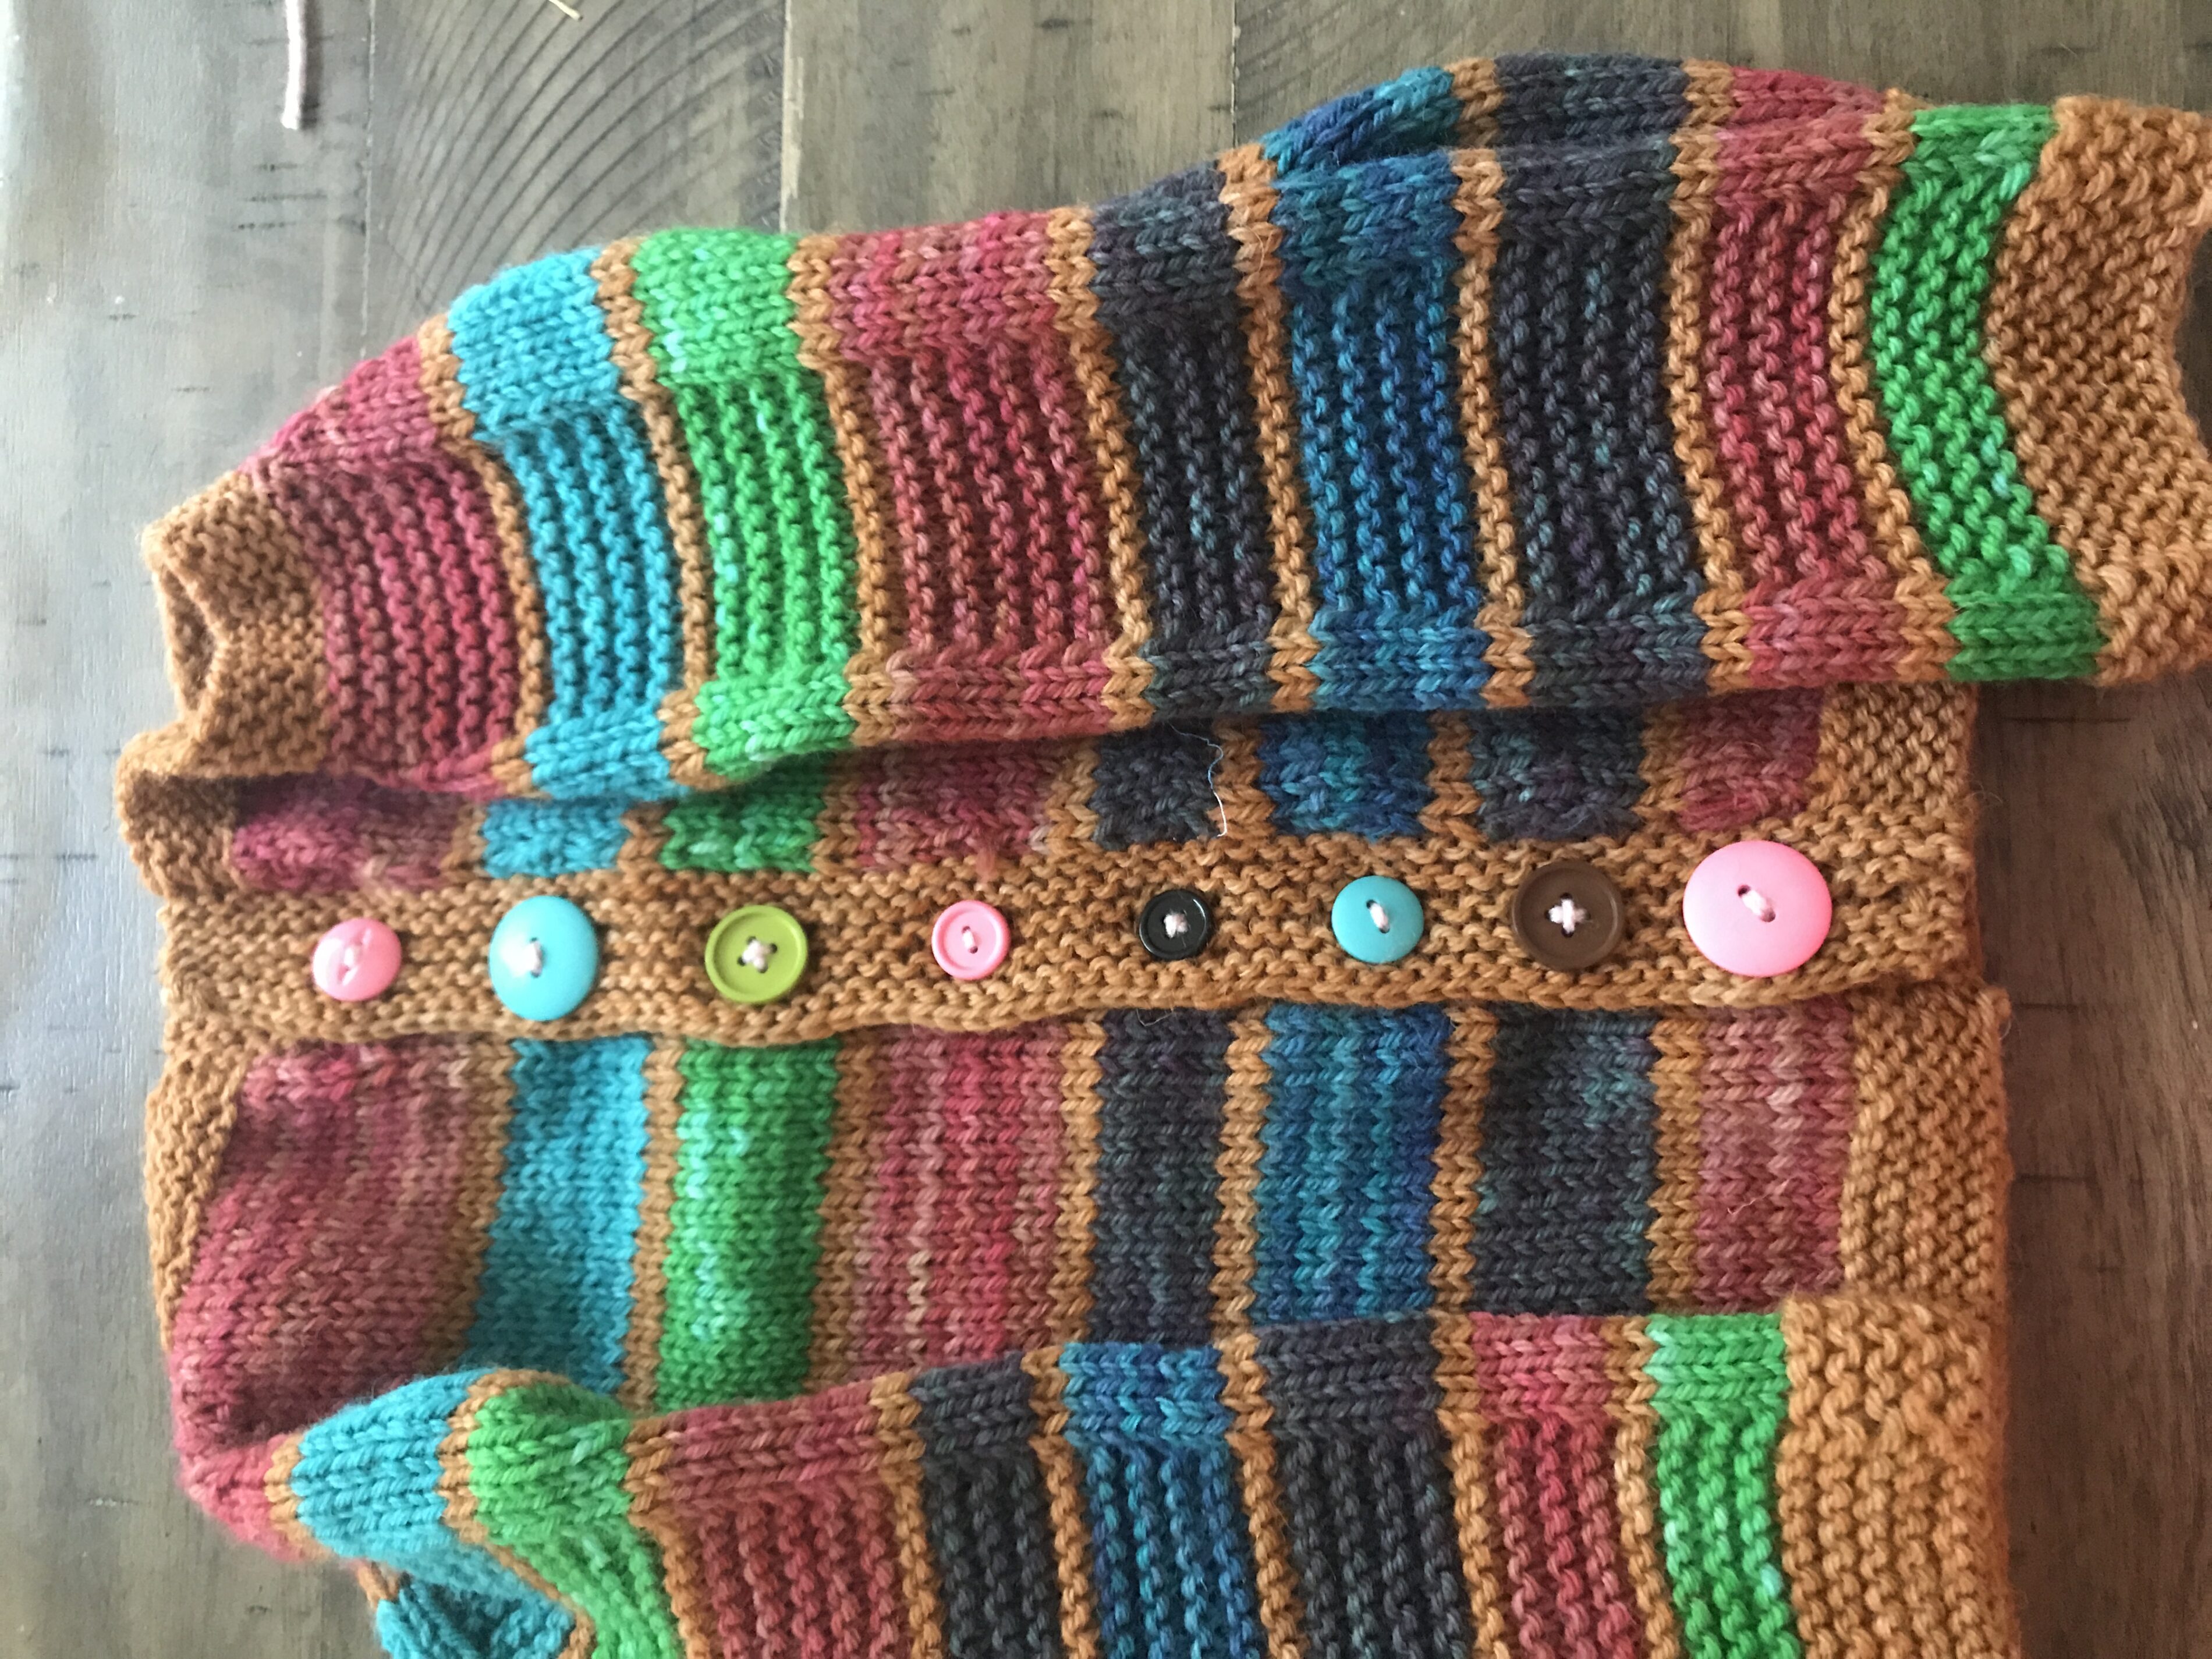
I’ve been knitting long enough now to have some confidence in what I’m doing. It’s rather a nice place to be! Today I’m going to talk about how I took a standard pullover sweater pattern (the Flax sweater, a free pattern of which I’ve made numerous iterations) and turned it into a cardigan for Dragonfly. Let’s start with a picture of the sweater I made:
The sweater pattern in its original form is knit in the round from the top down. This means that starting at the collar and working the neckline, then shoulders, then body, you knit a large tube of fabric that fits around a person. You then come back up to the armpits and knit the sleeves from pit to cuff.
The Flax sweater starts with ribbing at the collar. I changed this to garter stitch, which does two things. First, it matches the texture on the top of the sleeves. Second, because I was working flat instead of in the round (I wanted my sweater to be open in the front, so making a tube didn’t make sense), garter stitch is easier than rib because it’s knit every round (no purl stitches anywhere in sight). I did this for 1.5 inches.
For my sleeves to line up with the front of the sweater, I couldn’t put the markers (indicating where I needed to place my increases for the shoulders) in the same spots as the original pattern. To accommodate the change, I looked at the original pattern and determined which numbers were for the front and back, and which were for the sleeves. I took the front/back number and divided it in half. This gave me the number of stitches I needed for the left half of the front and the right half of the front. I then knit the first half, placed a marker, knit the first sleeve, placed a marker, knit the entire back (no need to divide this one in half), placed a marker, knit the other sleeve, placed a marker, and finally knit the second half of the front. From here on out I was able to follow the pattern as written, with the exception of working in rows instead of rounds.
The yarn I used on this sweater was partially freshly dyed wool for this specific project, partially leftovers from other recent sweaters. I incorporated all of the other colors as stripes in the sweater, and I chose to divide the stripes using a thin stripe of brown. I used that same brown for the collar, waist, wrist cuffs, and button bands.
When knitting the button band that would have the buttonholes (rather than the solid one where I would sew buttons on later), I chose to make a buttonhole at the approximate middle of each color stripe as opposed to placing them evenly all the way down the sweater. Then I found buttons in my stash that matched the colors of the stripes and placed a matching button on each stripe.
That’s it for this sweater! I’ll be starting another “Flax Hack” sweater tonight, so there’ll be another post in a few weeks explaining that one (it’s an adult size sweater for Scorpion, so it’s going to take a while to make).
Blessings,


that is a pretty sweater. Do you make/use your own wool? You referenced “partially freshly dyed wool” which is why I ask.
I would love to be able to make my own yarn at some point, but for now it’s all commercially bought. This yarn was white and I dyed it using food coloring in my kitchen ?
I love that sweater! Nice job changing up a pattern, that definitely reflects skill!