Author: Wendy
Crochet Dreidel (free pattern)
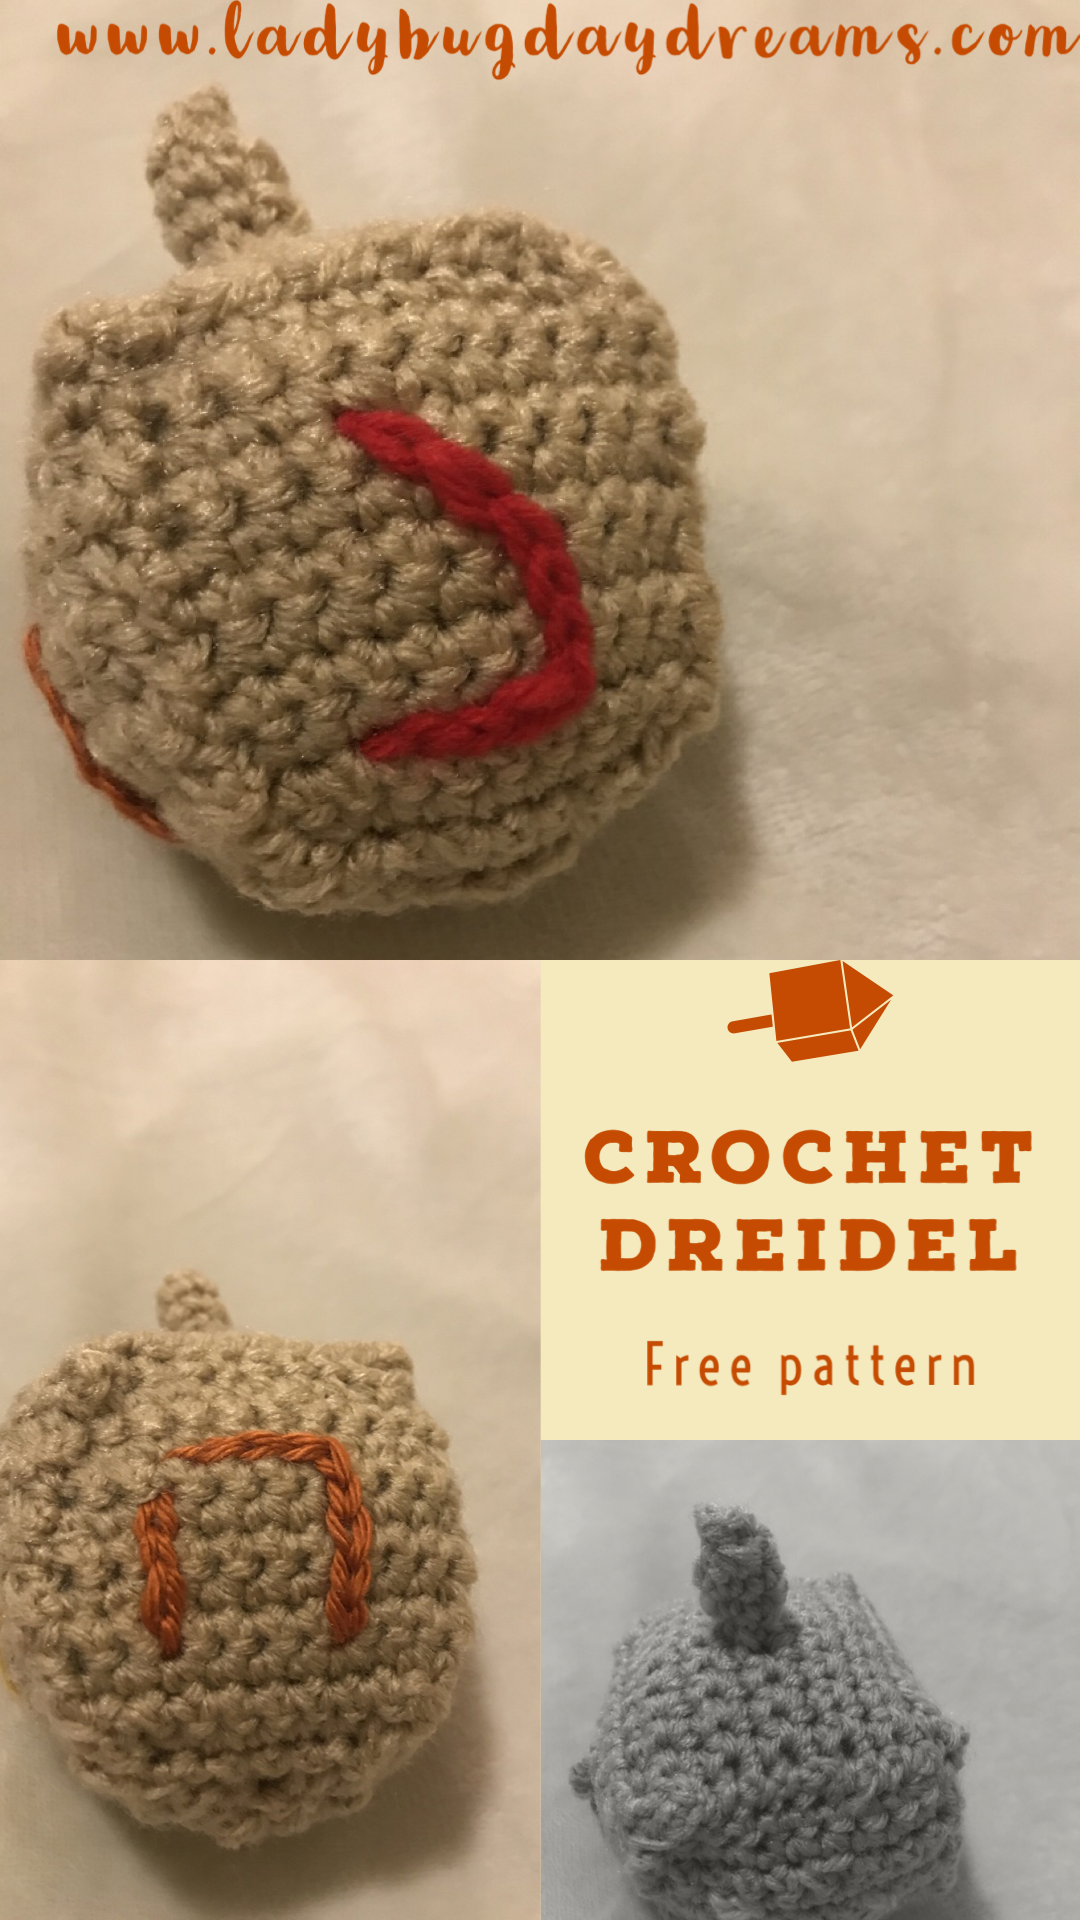
This year is our family’s first time celebrating Hanukkah, and I am trying to embrace that by making some decorations for our home. (Christmas decorations are easy to find; Hanukkah ones not so much.) Even finding patterns to make your own is difficult, so I created this dreidel and am excited to share it here today.
Crochet Dreidel
Gauge is not important to this project. Use any yarn you like and an appropriate hook for the yarn. The hook and yarn you choose will affect the size, but not in a positive or negative way. It’s all about preference. I used worsted weight yarn and a size H hook to get a dreidel about 3x3x5 (including the stem).
Side Panel: make 4
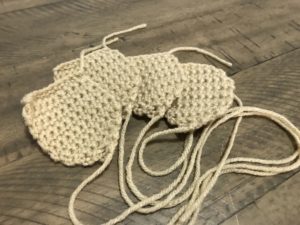
chain 11. SC in second chain from hook and each chain across. Ch 1. Turn. (10)
Rows 2-10. SC across (10). Ch 1. Turn.
Row 11: SC2tog, sc 6, SC2tog (8)
Row 12: SC2tog, sc 4, SC2tog (6)
Row 13: SC2tog, sc 2, SC2tog (4)
Row 14: SC2tog twice (2)
Row 15: SC2tog (1)
Fasten off, leaving a long tail for sewing.
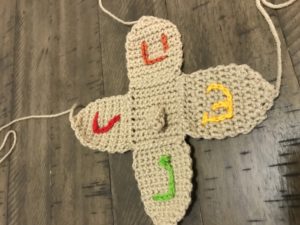
On each panel, surface slip stitch a (stylized) Hebrew letter.
Top:
Chain 11.
Row 1: SC in second stitch from hook and all the way across. Ch 1 and turn. (10)
Rows 2-5: SC across. Ch 1 and turn. (10)
Row 6: SC in first 4 stitches. Chain 2. Skip next 2 stitches. SC in remaining 4 stitches. Ch 1 and turn. (8 SC + 2 chains)
Row 7: SC in all stitches, including the two chains. Ch 1 and turn. (10)
Rows 8-11: SC across. Ch 1 and turn. (10)
Fasten off, leaving a long tail for sewing.
Into the buttonhole made in row 6, attach yarn with a slip stitch. Ch 1. SC into same stitch. SC in each of the other 5 stitches around the buttonhole (the two chains on each side, plus one side stitch on opposite sides.) Join with slip stitch to first stitch of round and chain 1 but do not turn. (6)
Rounds 2-4: SC around. Join and turn. (6)
Round 5: SC2tog three times. (3)
Fasten off and use the short tail to close the top of the “stem.”
Construction:
Sew the top of the side pieces to the sides of the top piece, one at a time. (See pictures for clarity.) Starting at the bottom of each side piece, sew them together until you get to the upper corner of each one. Stuff lightly before sewing the final side closed.
I hope this blesses someone out there!
How to Crochet Surface Slip Stitch
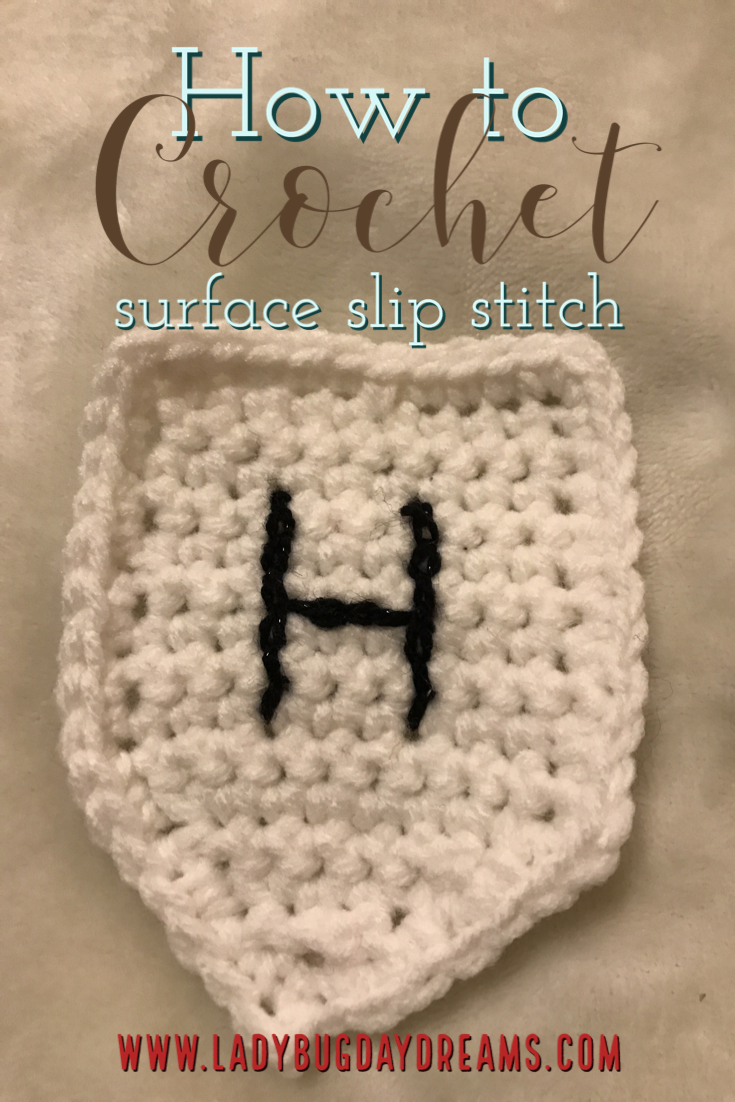
I have a free crochet pattern that I’ll be posting in a couple of days, but I wanted to post this tutorial on the surface slip stitch first, because my pattern requires use of the technique. You may be asking yourself, What is surface slip stitch? It’s simply a way to stitch designs onto your work that’s easier than using a crochet chain as an appliqué. The method is easy once you get the hang of it, so if you’ve never used it before, I hope this inspires you to try.
The main thing to remember about this technique is that your working yarn should be behind your main piece all the time. With that in mind, here’s a step by step tutorial. (These steps assume that you know how to crochet and have an idea of the design you want to make.)
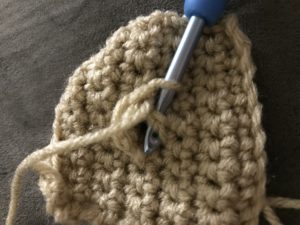
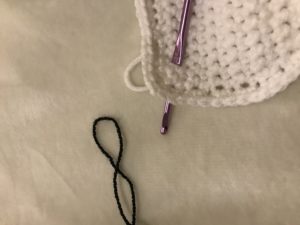
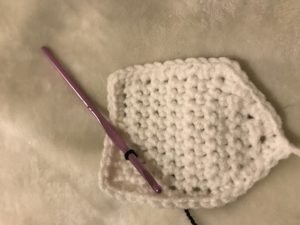
1. Insert your hook from front to back of your work, right where you want your design to begin. Attach your “drawing” yarn to your hook with a slip knot, then pull the loop through to the front.
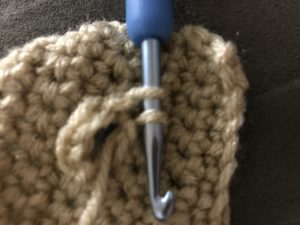
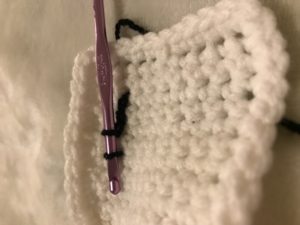
2. Keeping your design in mind, push your hook down through the fabric about one stitch away from where it is now. With your hook on the back of the fabric, yarn over and pull up a loop. With that loop now on the front of your fabric, complete the slip stitch.
3. Continue in this fashion until you’re done with your design.
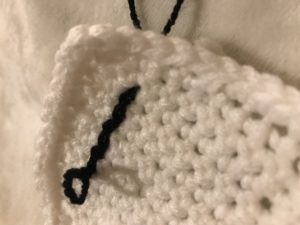
4. When you’ve completed your last stitch, remove the hook from your work and gently pull out the final stitch. Push your hook back through the fabric in the same spot you just undid that stitch from, this time from back to front. Grab the loop from the second to last stitch and carefully (without pulling too tightly and distorting your stitches) pull it to the back.
5. Break the yarn and fasten off as normal. Tie the beginning tail and ending tail together in a knot at this point, just for extra security. This also assures that your work will stay in place without you having to weave in the ends (since your yarn is probably a contrasting color to your main work, weaving the ends in is less than ideal). Once the tails are knotted together, you can cut the ends short.
I hope this helps you!
Blessings,
The Best Chocolate Cookies Ever
We like cookies. A lot. One day when I was looking for a new recipe, I found one for chocolate chip cookies, but with a twist: the dough is chocolate and the chips white. I’ve adapted it a tiny bit, and now am sharing our new favorite cookie recipe.
The Best Chocolate Cookies Ever
Makes 72 small cookies
1 cup (2 sticks) butter, softened
1 1/3 cup sugar (all white or half white, half brown)
2 eggs
2 tsp vanilla
2 cups all-purpose flour
3/4 cup unsweetened cocoa powder
1 tsp baking soda
1/2 tsp salt
~*~*~
1. Preheat oven to 350F.
2. In a large bowl, cream butter and sugar(s) together. Add eggs one at a time, mixing well after each addition. Mix in vanilla.
3. Turn the mixer off. Add flour, cocoa, soda, and salt. Turn the mixer back on and let it run until the dry ingredients are just combined. Do not overmix or your cookies will be tough.
4. Roll the dough into small balls about the size of a “shooter” marble. Place on a baking sheet 1-2” apart (they will flatten but not really spread).
5. Bake for 10 minutes. Let cool on the baking sheet for 5 minutes before moving to a serving plate.
~*~*~
Blessings,
Bumblebee: a birth story
 My csection went great. Much better than my dream the night before, in which everything was going wrong. The anesthesiologist was amazing! And my doc got a cyst removed from a sensitive area while I was already numb, so that’s good.
 We got bumped back by almost an hour because there was a 34 weeker delivering at my time. Vaginal, but the NICU team was needed for him/her and they like having them on hand for csections too, so we waited. I haven’t heard yet how that baby is doing, so maybe keep the family in your prayers.
They had a designated picture taker for us, and he gots of good ones using my iPhone throughout the entire procedure. I got a few minutes of skin to skin in the OR, which was a first for me and I loved it.
 I spent 2 hrs in recovery eating ice chips, then got moved up to the mother/baby unit where we’ll be for the rest of our stay. I was a bit dizzy from lack of sleep and quite itchy on my face from the anesthesia, but rest and IV meds took care of those. He’s nursed successfully three times now, by just 13 hours old (as I write this at 2:15 a.m.).
Weight: 7lbs, 4 oz. He’s the exact middle of my kids in this regard.
Length: 19.5 inches
Time: 1:20 pm
Apgar: 9, 9

Blessings,
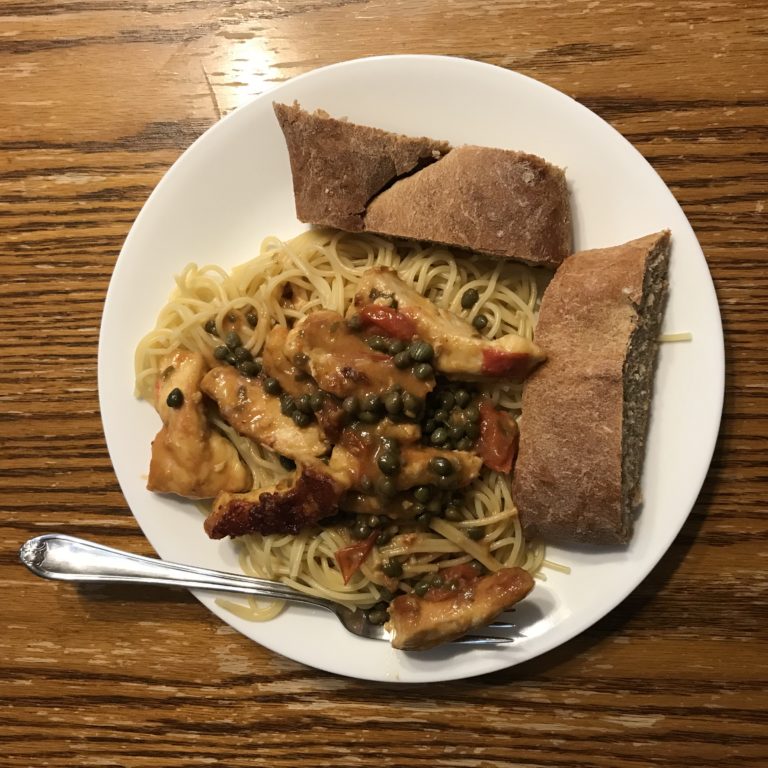
Recipe: Chicken Piccata
One of our favorite places to eat is The Old Spaghetti Factory. Will and I were there recently and he decided to try something new: the chicken piccata. It was really good, so I decided to try to recreate it at the house so everyone could taste it without breaking the bank. This is the result, and it’s become one of absolute favorite meals.
Chicken Piccata (serves 6-8)
2-3 chicken breasts, cut into strips
flour, for dredging
salt and pepper to taste
1 cup white wine
1 cup lemon juice
2 jars capers
3-4 Roma tomatoes, chopped
1 pound spaghetti or angel hair pasta, cooked according to package directions
Season the chicken strips with salt and pepper, then dredge in flour. Cook them in a bit of oil until cooked through.
Remove the chicken to a plate and keep warm. Add the wine to the pan and cook it for a minute or two until the alcohol cooks off. Add the lemon juice, capers, and tomatoes. Cook until the sauce thickens a bit.
Place the chicken back in the sauce and stir to coat.
Serve over a bed of pasta.
It takes a bit of time to make this recipe because of the frying of the chicken, but it’s not too bad. I can normally get dinner on the table for our entire family in about 45 minutes using this recipe.
Blessings,
Sausage Etouffe (Recipe)
One of Will’s favorite past times is going to a restaurant and trying something completely new. He’ll do this in “old favorite” restaurants as well as new ones we’ve never visited before. Recently, we went to a Cajun grill, and he ordered the Crawfish Etouffe (ay-too-fay). He described it as a “spicy tomato soup with rice and seafood.” I’m not a huge seafood fan (I like many kinds of fish, but not seafood in general), so I didn’t try any. But he found himself going back again and again for this dish because it was so good. He even took the older boys once, and when they got back they raved about it too. So one night when we were at the store with no idea of what to fix for dinner, he decided to look up an etouffe recipe. It was fairly simple with easy ingredients (except the crayfish), so we decided to give it a go, with one exception: we got a kielbasa for the protein instead. It was really delicious, and I’m so glad we tried it! Today I want to share our version of the recipe.
Sausage Etouffe
Serves 6-8
6 cups water
3 cups long grain rice
1 kielbasa, cut into small pieces
1 stick butter
1 onion, chopped
1/4 cup flour
1 8-oz can tomato sauce
2-3 cups water, or as needed
3-6 green onions, chopped
2 tbsp Cajun seasoning, more or less to taste
Salt and pepper to taste
Cook the rice in the water according to package directions.
While the rice cooks, melt the butter in a large saucepan. Cook the kielbasa and onions until the onions are soft. Add the flour to make a roux. Stir in the tomato sauce and water and cook to make a gravy/soup-like consistency. Add the green onions and seasonings; stir well to combine. Serve in bowls over the rice.
Blessings,
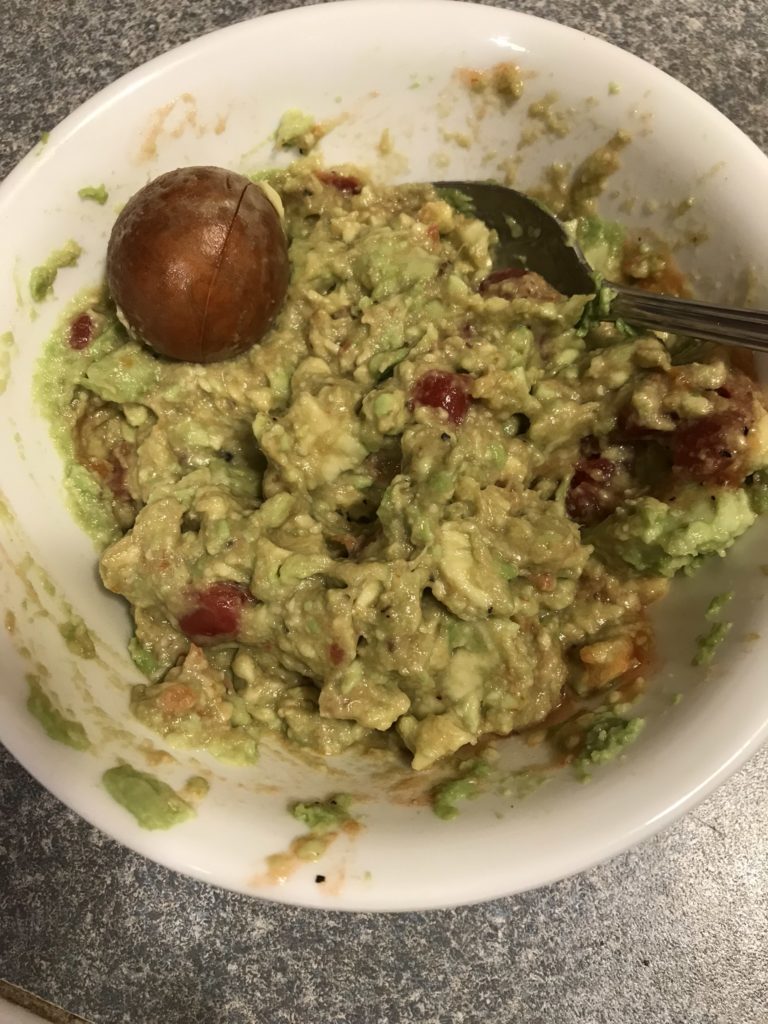
Recipe: Easy Guacamole
Most of my life, I thought I didn’t like avocados. I grew up in a home where my mom didn’t use them, and they always looked kind of weird, so I never bothered to try them, assuming that I wouldn’t like them. About three years ago, we were at our friends’ house, and they made tacos – with guacamole as an optional topping. I decided to give it a shot, just out of curiosity, and wow! Now avocados and guacamole are one of my favorite things to eat. I’ve tried guacamole from lots of different restaurants, and some of them are okay (Red Robin, any local Mexican place) and some are not (Chipotle, Fuddruckers). The thing the “bad” ones have in common is an overpowering fresh onion flavor – I’m not a fan of raw onion (and that’s not a blind distaste – I actually don’t like it). So I thought I’d share my favorite recipe for making guacamole at home, which is the best I’ve ever had, in a restaurant or otherwise.
Easy Guacamole
1-2 avocados, depending on how much guac you need/want
Approximately 1/4 cup salsa (your favorite)
Salt, pepper, garlic powder, and onion powder to taste
Cut the avocados in half and remove the pits. Scoop the flesh into a bowl and mash it lightly with a fork.
Add the salsa and spices and continue to mash and mix until everything is well combined. Taste. If it’s amazing, you’re done. If it’s only almost amazing, adjust the seasonings (salt is the one I always need to add more of) and try again until it’s exactly the way you like it.
Blessings,
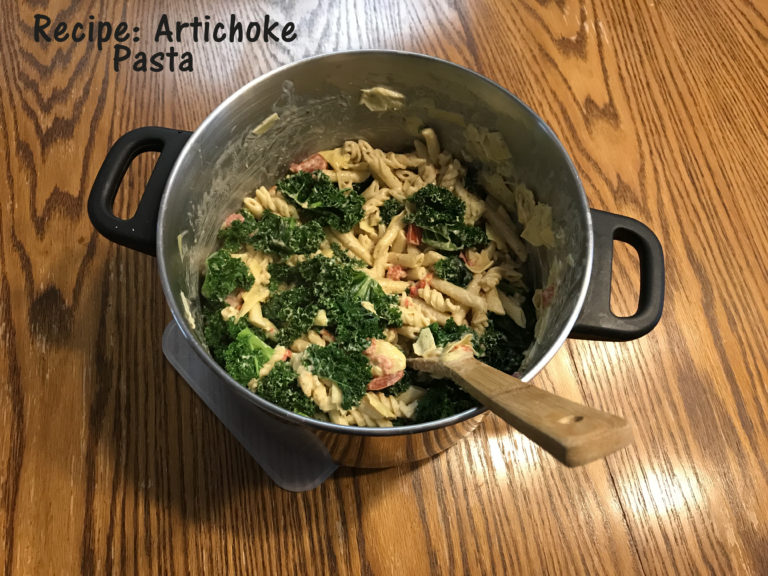
Recipe: Artichoke Pasta
Will was recently at a restaurant by himself, and he ordered something he normally wouldn’t – a pasta dish from a burger place. But he really liked it and decided to have us try to replicate it on our own. Here’s what we came up; he says it’s pretty close, and even if it wasn’t, it’s totally delicious. And the best part is that it works two ways: as a hot dish on its own (it’s a fantastic lunch), and as chilled leftovers in a pasta-salad type of way. The quantities I give will make a huge batch – enough for lunch one day and a side dish the next.
Artichoke Pasta
2 pounds rotini pasta (or your favorite bite-size)
Approximately 3 cups pesto-Alfredo sauce (we use 2 jars of Classico basil Alfredo)
1 bunch kale
2 cans artichoke hearts, chopped (but not too finely)
3-4 diced Roma tomatoes, or equivalent grape or cherry tomatoes
Bring a large pot of water to boil. While you’re waiting, get the kale ready by removing the leaves from the stems and chopping it roughly.
Add the pasta and kale to the pot together. Cook according to pasta box directions. Drain. (Don’t do what I did on picture day and forget the kale. It’s really much better if you cook it long enough.)
To the same pot, add the sauce, artichoke hearts, and tomatoes. Cook for a few minutes to heat the sauce and gently cook the vegetables.
Add the pasta-kale mixture to the sauce mixture and stir well to combine. Serve hot or chill and serve cold later.
Blessings,
Bringing Little Children to Jesus (review)
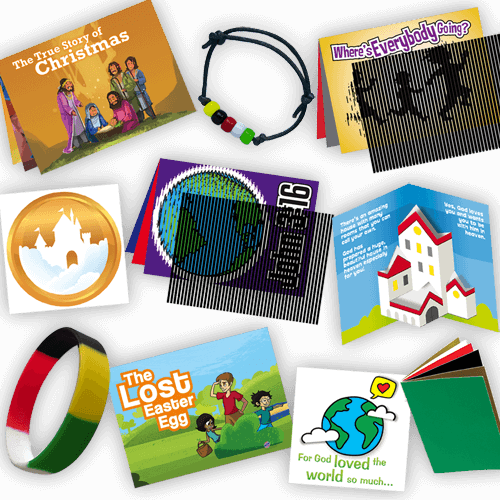
I wrote a few weeks about the Halloween tracts from Let the Little Children Come. Today I have a complimentary product to tell you about. It’s the Gospel Tracts and Evangelism Tools Sampler Pack, and it contains several little tools for children witnessing to other children. Let’s dive right in.
First up, and just right for this time of year, is The True Story of Christmas. This is a mini book (most of the things in this pack are mini books) that tells of the birth of Christ. The words are easy to understand, so even a very young child can make sense of the story.
On the topic of holidays, the kit also includes The Lost Easter Egg, another mini book (one of the characters shares a name with Seahawk!) that explains why the eggs aren’t really all that important when it comes to Easter.
When I wrote about the Is There Anything Better than Candy Box Tracts, I suggested that one thing that would make a good filler would be a “wordless story” book or bracelet. Well, guess what? The Sampler Pack comes with both of those. The book is a very small (about 1/4 the size of the other mini books in the pack), and has no words or pictures. It’s just colors, one per page, and each one gives an important piece of the gospel story. There’s a whole page on the Let the Little Children Come website devoted to this tiny book, which was developed by Charles Spurgeon in 1866, and how to use it. I’m not going to go over all of that here, but I did want to mention what each color represents.
It begins with a green cover, to remind us to always grow in Christ. The first page is gold, to remind us of Heaven. But then it leads straight into a black page, because our sin prevents us from going there to be with God. God knew we would sin, and therefore came up with the way back to him – the sacrifice of Jesus, represented by a red page. Jesus’s purity allows us to become as white as snow, so that’s the next color. The gold and green are then repeated to close out the book. This is a wonderful tool because it works in any language. The colors don’t have to change in order to explain it to anyone who’s listening.
To go along with the Wordless book, there’s a bracelet version of the colors. This comes with an adjustable cord (to fit most children and adults) and a bead of each color. Children are told the story as they put the beads on in the order in which they’re presented, and then they have a physical reminder of the story they were presented. If you’ve got an older crowd who may not be interested in a beaded bracelet, there’s also a silicone one available (on its own or in the Sampler pack).
 My favorite items from the kit are the animated books. Each one tells a story related to the gospel, and the pictures look a little funny on their own. But rub the black-and-clear transparency sheet (included in each book) over it, and the pictures come to life right before your eyes. There are 3 of these in the kit: The True Story of Christmas (which I talked about earlier), Where’s Everyone Going?, and John 3:16.
The Easter book is one of two pop up books, which are always popular with little kids! The other one is called The Most Amazing House, which tells about Heaven (in my Father’s house there are many, many rooms).
As far as using these products, we haven’t really done much with them yet. I looked at all of them (and really liked every single one!), but because of where we live, there hasn’t been much opportunity. We hope to move soon, though, and I think it will be really neat to give these to my boys once they start to make friends in our new neighborhood so they can witness to the people around them. That’s my long-term plan, anyway.
Blessings,


